Top Songs Of 2012
The song has received positive reviews from critics who complimented the song’s effective lyrics and chorus, and commended Ludacris’ part and the song’s ability to have an urban twist.

Most Visited Websites 2011-2012
Google Search or Google Web Search is a web search engine owned by Google Inc. Google Search is the most-used search engine on the World Wide Web, receiving several hundred million queries each day through its various services.

History of Facebook
Mark Zuckerberg wrote Facemash, the predecessor to Facebook, on October 28, 2003, while attending Harvard as a sophomore. According to The Harvard Crimson, the site was comparable to Hot or Not, and "used photos compiled from the online facebooks of nine houses.

Airtel 3G 70% less in Kerala Plans
First time users please follow the steps as given below to go 3G in Kerala:- » Select network settings to "automatic" on your handset » Choose "3G only mode" and wait for network registration. » After registration and seeing 3G network on your handset, Select "Dual Mode" or "3G and 2G mode" to enjoy 3G .

Aakash Tablet is Available For Booking
You can Order your Aakash Tablet now. The long wait for Aakash Tablet is now over. Now you can book your Aakash Tablet online which will be delivered within a week from the day of booking. Aakash was the most awaited Indian Tablet, which took many people’s attention all over the world.
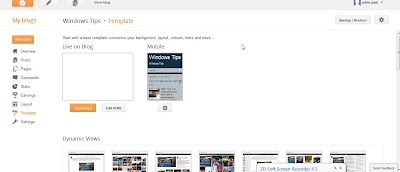
How to Change Blogspot Interface
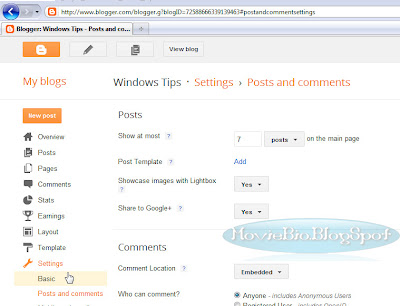
- First you go to the blog settings
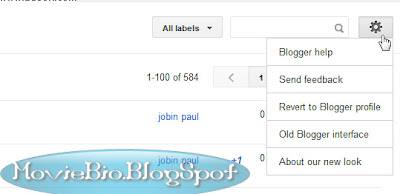
- Click on the settings
- Then select the old interface you are done now you can view your blog in old interface
How to Set Page Tab Top of The Blog
* To Make Your Page Tab On The Top of The Blog How to do It
Here is The Way to Make your Page tab To Top Of the Page
* On The blog Dashbord Click on Pages

* Then Click On the Don't show button

* And select the top Tabs option

* Then Save the settings .
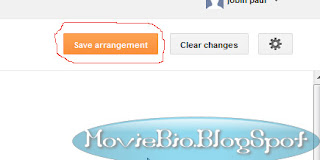
You done Then check your blog you can see the page tab on the top
For Watch This Video
Create Image Gallery For Blogger With Control Options
- Log in to your Blogger account
- Go To Design > Page Elements
- Select HTML/JavaScript widget
- Paste the following code inside it,
<script type="text/javascript" src="http://ajax.googleapis.com/ajax/libs/jquery/1.6.0/jquery.min.js"></script>Now carefully make these changes:
<style type="text/css">
/*Make sure your page contains a valid doctype at the top*/
#simplegallery1{ //CSS for Simple Gallery Example 1
position: relative; /*keep this intact*/
visibility: hidden; /*keep this intact*/
border: 1px solid #666;
}
#simplegallery1 .gallerydesctext{ //CSS for description DIV of Example 1 (if defined)
text-align: left;
padding: 2px 5px;
font: 10px normal verdana, arial;
}
</style>
<script type="text/javascript" >
var simpleGallery_navpanel={
loadinggif: 'http://2.bp.blogspot.com/-ksi5eL8Tbnw/TlVybEe2EeI/AAAAAAAAExc/bzJY4U3_5Dk/s400/ajaxload.gif', //full path or URL to loading gif image
panel: {height:'45px', opacity:0.5, paddingTop:'5px', fontStyle:'bold 11px Verdana'}, //customize nav panel container
images: [ 'http://2.bp.blogspot.com/-LzMDVlVfxmQ/TlVybqSABOI/AAAAAAAAEx8/riOJdIu1eRc/s400/left.gif', 'http://1.bp.blogspot.com/-ZkATWoPt8Q8/TlVybVMA4xI/AAAAAAAAExs/zoAjOL7erWY/s400/play.gif', 'http://4.bp.blogspot.com/-IlIucHdUM-I/TlVybkMej0I/AAAAAAAAEx0/yQvxG-paQVc/s400/right.gif', 'http://1.bp.blogspot.com/-qdHg1fyty6A/TlVybOlRciI/AAAAAAAAExk/oio-_kn2KO8/s400/pause.gif'], //nav panel images (in that order)
imageSpacing: {offsetTop:[-4, 0, -4], spacing:10}, //top offset of left, play, and right images, PLUS spacing between the 3 images
slideduration: 500 //duration of slide up animation to reveal panel
}
function simpleGallery(settingarg){
this.setting=settingarg
settingarg=null
var setting=this.setting
setting.panelheight=(parseInt(setting.navpanelheight)>5)? parseInt(setting.navpanelheight) : parseInt(simpleGallery_navpanel.panel.height)
setting.fadeduration=parseInt(setting.fadeduration)
setting.curimage=(setting.persist)? simpleGallery.routines.getCookie("gallery-"+setting.wrapperid) : 0
setting.curimage=setting.curimage || 0 //account for curimage being null if cookie is empty
setting.preloadfirst=(!jQuery.Deferred)? false : (typeof setting.preloadfirst!="undefined")? setting.preloadfirst : true //Boolean on whether to preload all images before showing gallery
setting.ispaused=!setting.autoplay[0] //ispaused reflects current state of gallery, autoplay[0] indicates whether gallery is set to auto play
setting.currentstep=0 //keep track of # of slides slideshow has gone through
setting.totalsteps=setting.imagearray.length*setting.autoplay[2] //Total steps limit: # of images x # of user specified cycles
setting.fglayer=0, setting.bglayer=1 //index of active and background layer (switches after each change of slide)
setting.oninit=setting.oninit || function(){}
setting.onslide=setting.onslide || function(){}
var preloadimages=[], longestdesc=null, loadedimages=0
var dfd = (setting.preloadfirst)? jQuery.Deferred() : {resolve:function(){}, done:function(f){f()}} //create real deferred object unless preloadfirst setting is false or browser doesn't support it
setting.longestdesc="" //get longest description of all slides. If no desciptions defined, variable contains ""
setting.$loadinggif=(function(){ //preload and ref ajax loading gif
var loadgif=new Image()
loadgif.src=simpleGallery_navpanel.loadinggif
return jQuery(loadgif).css({verticalAlign:'middle'}).wrap('<div style="position:absolute;text-align:center;width:100%;height:100%" />').parent()
})()
for (var i=0; i<setting.imagearray.length; i++){ //preload slideshow images
preloadimages[i]=new Image()
preloadimages[i].src=setting.imagearray[i][0]
if (setting.imagearray[i][3] && setting.imagearray[i][3].length>setting.longestdesc.length)
setting.longestdesc=setting.imagearray[i][3]
jQuery(preloadimages[i]).bind('load error', function(){
loadedimages++
if (loadedimages==setting.imagearray.length){
dfd.resolve() //indicate all images have been loaded
}
})
}
var slideshow=this
jQuery(document).ready(function($){
var setting=slideshow.setting
setting.$wrapperdiv=$('#'+setting.wrapperid).css({position:'relative', visibility:'visible', background:'black', overflow:'hidden', width:setting.dimensions[0], height:setting.dimensions[1]}).empty() //main gallery DIV
if (setting.$wrapperdiv.length==0){ //if no wrapper DIV found
alert("Error: DIV with ID \""+setting.wrapperid+"\" not found on page.")
return
}
setting.$gallerylayers=$('<div class="gallerylayer"></div><div class="gallerylayer"></div>') //two stacked DIVs to display the actual slide
.css({position:'absolute', left:0, top:0})
.appendTo(setting.$wrapperdiv)
setting.$loadinggif.css({top:setting.dimensions[1]/2-30}).appendTo(setting.$wrapperdiv) //30 is assumed height of ajax loading gif
setting.gallerylayers=setting.$gallerylayers.get() //cache stacked DIVs as DOM objects
setting.navbuttons=simpleGallery.routines.addnavpanel(setting) //get 4 nav buttons DIVs as DOM objects
if (setting.longestdesc!="") //if at least one slide contains a description (feature is enabled)
setting.descdiv=simpleGallery.routines.adddescpanel(setting)
$(setting.navbuttons).filter('img.navimages').css({opacity:0.8})
.bind('mouseover mouseout', function(e){
$(this).css({opacity:(e.type=="mouseover")? 1 : 0.8})
})
.bind('click', function(e){
var keyword=e.target.title.toLowerCase()
slideshow.navigate(keyword) //assign behavior to nav images
})
dfd.done(function(){ //execute when all images have loaded
setting.$loadinggif.remove()
setting.$wrapperdiv.bind('mouseenter', function(){slideshow.showhidenavpanel('show')})
setting.$wrapperdiv.bind('mouseleave', function(){slideshow.showhidenavpanel('hide')})
slideshow.showslide(setting.curimage) //show initial slide
setting.oninit.call(slideshow) //trigger oninit() event
$(window).bind('unload', function(){ //clean up and persist
$(slideshow.setting.navbuttons).unbind()
if (slideshow.setting.persist) //remember last shown image's index
simpleGallery.routines.setCookie("gallery-"+setting.wrapperid, setting.curimage)
jQuery.each(slideshow.setting, function(k){
if (slideshow.setting[k] instanceof Array){
for (var i=0; i<slideshow.setting[k].length; i++){
if (slideshow.setting[k][i].tagName=="DIV") //catches 2 gallerylayer divs, gallerystatus div
slideshow.setting[k][i].innerHTML=null
slideshow.setting[k][i]=null
}
}
if (slideshow.setting[k].innerHTML) //catch gallerydesctext div
slideshow.setting[k].innerHTML=null
slideshow.setting[k]=null
})
slideshow=slideshow.setting=null
})
}) //end deferred code
}) //end jQuery domload
}
simpleGallery.prototype={
navigate:function(keyword){
clearTimeout(this.setting.playtimer)
this.setting.totalsteps=100000 //if any of the nav buttons are clicked on, set totalsteps limit to an "unreachable" number
if (!isNaN(parseInt(keyword))){
this.showslide(parseInt(keyword))
}
else if (/(prev)|(next)/i.test(keyword)){
this.showslide(keyword.toLowerCase())
}
else{ //if play|pause button
var slideshow=this
var $playbutton=$(this.setting.navbuttons).eq(1)
if (!this.setting.ispaused){ //if pause Gallery
this.setting.autoplay[0]=false
$playbutton.attr({title:'Play', src:simpleGallery_navpanel.images[1]})
}
else if (this.setting.ispaused){ //if play Gallery
this.setting.autoplay[0]=true
this.setting.playtimer=setTimeout(function(){slideshow.showslide('next')}, this.setting.autoplay[1])
$playbutton.attr({title:'Pause', src:simpleGallery_navpanel.images[3]})
}
slideshow.setting.ispaused=!slideshow.setting.ispaused
}
},
showslide:function(keyword){
var slideshow=this
var setting=slideshow.setting
var totalimages=setting.imagearray.length
var imgindex=(keyword=="next")? (setting.curimage<totalimages-1? setting.curimage+1 : 0)
: (keyword=="prev")? (setting.curimage>0? setting.curimage-1 : totalimages-1)
: Math.min(keyword, totalimages-1)
setting.gallerylayers[setting.bglayer].innerHTML=simpleGallery.routines.getSlideHTML(setting.imagearray[imgindex])
setting.$gallerylayers.eq(setting.bglayer).css({zIndex:1000, opacity:0}) //background layer becomes foreground
.stop().css({opacity:0}).animate({opacity:1}, setting.fadeduration, function(){ //Callback function after fade animation is complete:
clearTimeout(setting.playtimer)
setting.gallerylayers[setting.bglayer].innerHTML=null //empty bglayer (previously fglayer before setting.fglayer=setting.bglayer was set below)
try{
setting.onslide.call(slideshow, setting.gallerylayers[setting.fglayer], setting.curimage)
}catch(e){
alert("Simple Controls Gallery: An error has occured somwhere in your code attached to the \"onslide\" event: "+e)
}
setting.currentstep+=1
if (setting.autoplay[0]){
if (setting.currentstep<=setting.totalsteps)
setting.playtimer=setTimeout(function(){slideshow.showslide('next')}, setting.autoplay[1])
else
slideshow.navigate("play/pause")
}
}) //end callback function
setting.gallerylayers[setting.fglayer].style.zIndex=999 //foreground layer becomes background
setting.fglayer=setting.bglayer
setting.bglayer=(setting.bglayer==0)? 1 : 0
setting.curimage=imgindex
setting.navbuttons[3].innerHTML=(setting.curimage+1) + '/' + setting.imagearray.length
if (setting.imagearray[imgindex][3]){ //if this slide contains a description
setting.$descpanel.css({visibility:'visible'})
setting.descdiv.innerHTML=setting.imagearray[imgindex][3]
}
else if (setting.longestdesc!=""){ //if at least one slide contains a description (feature is enabled)
setting.descdiv.innerHTML=null
setting.$descpanel.css({visibility:'hidden'})
}
},
showhidenavpanel:function(state){
var setting=this.setting
var endpoint=(state=="show")? setting.dimensions[1]-setting.panelheight : this.setting.dimensions[1]
setting.$navpanel.stop().animate({top:endpoint}, simpleGallery_navpanel.slideduration)
if (setting.longestdesc!="") //if at least one slide contains a description (feature is enabled)
this.showhidedescpanel(state)
},
showhidedescpanel:function(state){
var setting=this.setting
var endpoint=(state=="show")? 0 : -setting.descpanelheight
setting.$descpanel.stop().animate({top:endpoint}, simpleGallery_navpanel.slideduration)
}
}
simpleGallery.routines={
getSlideHTML:function(imgelement){
var layerHTML=(imgelement[1])? '<a href="'+imgelement[1]+'" target="'+imgelement[2]+'">\n' : '' //hyperlink slide?
layerHTML+='<img src="'+imgelement[0]+'" style="border-width:0" />'
layerHTML+=(imgelement[1])? '</a>' : ''
return layerHTML //return HTML for this layer
},
addnavpanel:function(setting){
var interfaceHTML=''
for (var i=0; i<3; i++){
var imgstyle='position:relative; border:0; cursor:hand; cursor:pointer; top:'+simpleGallery_navpanel.imageSpacing.offsetTop[i]+'px; margin-right:'+(i!=2? simpleGallery_navpanel.imageSpacing.spacing+'px' : 0)
var title=(i==0? 'Prev' : (i==1)? (setting.ispaused? 'Play' : 'Pause') : 'Next')
var imagesrc=(i==1)? simpleGallery_navpanel.images[(setting.ispaused)? 1 : 3] : simpleGallery_navpanel.images[i]
interfaceHTML+='<img class="navimages" title="' + title + '" src="'+ imagesrc +'" style="'+imgstyle+'" /> '
}
interfaceHTML+='<div class="gallerystatus" style="margin-top:1px">' + (setting.curimage+1) + '/' + setting.imagearray.length + '</div>'
setting.$navpanel=$('<div class="navpanellayer"></div>')
.css({position:'absolute', width:'100%', height:setting.panelheight, left:0, top:setting.dimensions[1], font:simpleGallery_navpanel.panel.fontStyle, zIndex:'1001'})
.appendTo(setting.$wrapperdiv)
$('<div class="navpanelbg"></div><div class="navpanelfg"></div>') //create inner nav panel DIVs
.css({position:'absolute', left:0, top:0, width:'100%', height:'100%'})
.eq(0).css({background:'black', opacity:simpleGallery_navpanel.panel.opacity}).end() //"navpanelbg" div
.eq(1).css({paddingTop:simpleGallery_navpanel.panel.paddingTop, textAlign:'center', color:'white'}).html(interfaceHTML).end() //"navpanelfg" div
.appendTo(setting.$navpanel)
return setting.$navpanel.find('img.navimages, div.gallerystatus').get() //return 4 nav related images and DIVs as DOM objects
},
adddescpanel:function(setting){
setting.$descpanel=$('<div class="gallerydesc"><div class="gallerydescbg"></div><div class="gallerydescfg"><div class="gallerydesctext"></div></div></div>')
.css({position:'absolute', width:'100%', left:0, top:-1000, zIndex:'1001'})
.find('div').css({position:'absolute', left:0, top:0, width:'100%'})
.eq(0).css({background:'black', opacity:simpleGallery_navpanel.panel.opacity}).end() //"gallerydescbg" div
.eq(1).css({color:'white'}).end() //"gallerydescfg" div
.eq(2).html(setting.longestdesc).end().end()
.appendTo(setting.$wrapperdiv)
var $gallerydesctext=setting.$descpanel.find('div.gallerydesctext')
setting.descpanelheight=$gallerydesctext.outerHeight()
setting.$descpanel.css({top:-setting.descpanelheight, height:setting.descpanelheight}).find('div').css({height:'100%'})
return setting.$descpanel.find('div.gallerydesctext').get(0) //return gallery description DIV as a DOM object
},
getCookie:function(Name){
var re=new RegExp(Name+"=[^;]+", "i"); //construct RE to search for target name/value pair
if (document.cookie.match(re)) //if cookie found
return document.cookie.match(re)[0].split("=")[1] //return its value
return null
},
setCookie:function(name, value){
document.cookie = name+"=" + value + ";path=/"
}
}
</script>
<script type="text/javascript">
var mygallery=new simpleGallery({
wrapperid: "simplegallery1", //ID of main gallery container,
dimensions: [300, 200], //width/height of gallery in pixels. Should reflect dimensions of the images exactly
imagearray: [
["IMAGE LINK 1", "#", "_new", "DESCRIPTION"],
["IMAGE LINK 2", "#", "_new", "DESCRIPTION"],
["IMAGE LINK 3","#", "_new", "DESCRIPTION"],
["IMAGE LINK 4", "#", "_new", "DESCRIPTION"],
["IMAGE LINK 5", "#", "_new", "DESCRIPTION"] ],
autoplay: [true, 2000, 20], //[auto_play_boolean, delay_btw_slide_millisec, cycles_before_stopping_int]
persist: false, //remember last viewed slide and recall within same session?
fadeduration: 500, //transition duration (milliseconds)
oninit:function(){ //event that fires when gallery has initialized/ ready to run
//Keyword "this": references current gallery instance (ie: try this.navigate("play/pause"))
},
onslide:function(curslide, i){ //event that fires after each slide is shown
//Keyword "this": references current gallery instance
//curslide: returns DOM reference to current slide's DIV (ie: try alert(curslide.innerHTML)
//i: integer reflecting current image within collection being shown (0=1st image, 1=2nd etc)
}
})
</script>
<div id="simplegallery1"></div>
- Resize all your images to a fixed size. To change the image size edit 300, 200 where 300 is the width and 200 is the height. If your images are of bigger size then they will be clipped rather resized. So its better that you manually first resize your images in Photoshop and then proceed.
- Upload your images in blogger and then replace IMAGE LINK 1, IMAGE LINK 2 ,...., so on with your Image links in that order.
- Replace # with the Page Link. The visitors will click the image to land on a page so mention the URL of that page. If you don't want to link the image then simply delete #
- Replace DESCRIPTION with some information about the image. This image decription will appear at the top when a user hovers cursor on it. If you don't want to write any description then simply delete DESCRIPTION
- If you don't want the images to play automatically then turn off auto play. Turn true to false.
- To change the time interval between next and previous slide then edit 2000
- That's it! You are all done! :)
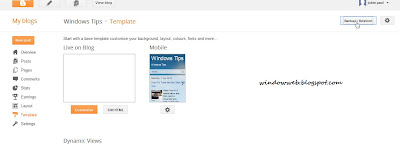
How change your blog templates In easy Way
How change your blog templates
- First click on Templates in blogger settings
- Then click on backup/restore
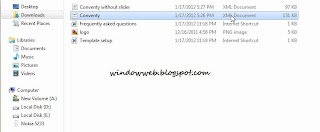
- Then Select a templates (you must download a template from internet you can get many free template from web btemplates.com/ )
Related Posts with Thumbnails for Blogger
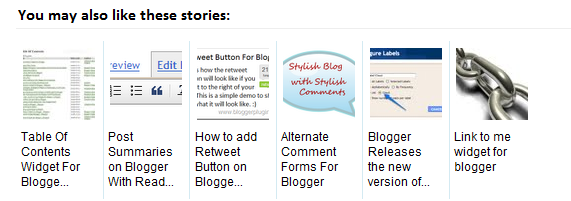
Displaying the links to related posts along with a thumbnail of the corresponding post will help you increase the page views/user .Users will be tempted to go for the related posts when they are presented attractively with thumbnails.
This is another first release from me.This one also uses the media thumbnails generated by blogger for each post.
For displaying the thumbnails,this widget will use the images uploaded for the post using the blogger image uploader(from the post editor) [Update - Now supports external images also.]
For this widget you fist go to

Install Widget on Blogger


Guide To Check Website Backlinks

As you start promoting your newly launched website through various off page SEO strategies, you will be often curious to count your backlinks and their value. Indeed, knowing the quality and number of backlinks will help you in link campaigns. How to check backlinks is the first question that comes to the mind of a newbie. There are aplenty ways to check the number of backlinks your sites have.
The most common way to check your backlink is typing the following syntax in Google, link:domain.com. This will instantly list out websites the point toward yours. However, Google will not reveal all the links to avoid link spamming. There are various specialized SEO tools that help you find out the number of backlinks to your website. Some of them can tell you the PR of the linking sites and the exact link location too.
There are many websites that have backlink checking tools online. You just have to type your URL and click the submit button. Instantly the tool will reveal the number of backlinks along with keywords and also other details such as your website value, popularity, interest, and depth.
Mozilla’s free SEO tools are very popular and can help you in finding out the number of websites that link to yours. You just have visit the official website, download the tools and install them on to your Mozilla web browser. This way you can check the status of your backlinks with a click or two.
For those who do not wish to download SEO tools, yet wish to check backlinks the following URLs can be of great help.
* http://www.iwebtool.com/backlink_checker
* http://www.backlinkwatch.com/
* http://www.domain-pop.com/
* http://www.online-utility.org/webmaster/backlink_domain_analyzer.jsp
* http://www.searchenginegenie.com/backlink-checker.html
If you like to download free SEO tools and start building links in a professional way the following are the places to go.
* http://www.netbuilders.org/tools/
* http://tools.seobook.com/
* http://www.seocompany.ca/tool/seo-tools.html
* http://www.seotoolset.com/tools/free_tools.html
* http://www.webuildpages.com/tools/
* http://www.submitshop.com/tools/
While the above mentioned websites are some of the top resources for checking backlinks, a simple search in the internet will display hundreds of websites that can help you analyze backlinks and promote your websites in a systematic way.
How To : Add Simple Facebook Like Box Below Every Post in Blogger
How To : Add Simple Facebook Like Box Below Every Post in Blogger
Use of social media will definitely brings you tons of visitors. We all
know, blog traffic is directly proportional to money. Hence making more
page views will boost your income from the blog. Adding a simple
Facebook Like box below every postin blogger will helps you to increase
the Facebook fans as well as traffic. Thisis a simple tutorial on
adding a light script in your blogger HTML codex. Thus more visitors
assured.
How To Add the Scriptin HTML Part
This doesn’t need any
coding skill at all. just follow my instructions and you will be
acquiring the tipto add the Facebook box below every blog post.
Note: This is only for Blogger blogs and won’t work in WordPress blogs. There are some plugins for WordPressto add the same.
Procedure
*. As usual log in to your blogger dashboard and move to Template> Edit HTML
*. You have to Expand the HTML code to find a certain code. So Mark “Expand Widget Template” as shown below

*. Now search for <data:post.body/> bypressing Ctrl+F in your keyword.
*. Now just below the above code, add the below script in the body.
<b:if
cond=’data:blog.pageType ==
&quot;item&quot;’><iframe
allowTransparency=’true’ frameborder=’0′ scrolling=’no’
src=’//www.facebook.com/plugins/likebox.php?href=http%3A%2F%2Fwww.facebook.com%2F
tricksmash &amp;width= 622 &amp;height= 180
&amp;colorscheme=light&amp;show_faces=true&amp;border_color&amp;stream=false&amp;header=false’
style=’border:none; overflow:hidden; width: 622 px; height: 180
px;’/></b:if>
*. Just replace the pink colored
part to your own custom data.Replace with your fb fan page idand the
height and width respectively.
Done. move back to your blogger blog and now check whether the facebook fan box appears below every post.
How to avoid word verification on Blog
In this case, word verification is applied to certain potential spam blogs by an automated system. Because this is automated there will necessarily be some false positives, though we're continually working on improving our algorithms to avoid these. If your blog is one of the false positives, we apologize. Having the word verification on your posting form does not prevent you from publishing and does not mean that your blog will be deleted or otherwise punished if it is not actually in violation of our policies.
To avoid further inconveniences when publishing, click the "?" (question mark) icon next to the word verification on your posting form:
 That will take you to a page where you can request a review for your
blog. We'll have someone look at it, verify that it isn't spam, and then
whitelist your blog so it no longer has the word verification
requirement.
Related Posts Widget For Blogger
Related Posts Widget For Blogger
</head>
<!--Related Posts Scripts and Styles Start--> <!--Remove--><b:if cond='data:blog.pageType == "item"'> <style type="text/css"> #related-posts { float:center; text-transform:none; height:100%; min-height:100%; padding-top:5px; padding-left:5px; } #related-posts .widget{ padding-left:6px; margin-bottom:10px; } #related-posts .widget h2, #related-posts h2{ font-size: 1.6em; font-weight: bold; color: black; font-family: Georgia, “Times New Roman”, Times, serif; margin-bottom: 0.75em; margin-top: 0em; padding-top: 0em; } #related-posts a{ color:blue; } #related-posts a:hover{ color:blue; } #related-posts ul{ list-style-type:none; margin:0 0 0px 0; padding:0px; text-decoration:bold; font-size:15px; text-color:#000000 } #related-posts ul li{ background:transparent url(http://2.bp.blogspot.com/_u4gySN2ZgqE/SnZhv_C6bTI/AAAAAAAAAl4/Rozt7UhvgOo/s200/greentickbullet.png) no-repeat ; display:block; list-style-type:none; margin-bottom: 13px; padding-left: 30px; padding-top:0px;} </style> <script type='text/javascript'> var relatedpoststitle="Related Posts"; </script> <script src='http://bloggergadgets.googlecode.com/files/related_posts_min.js' type='text/javascript'/> <!--Remove--></b:if> <!--Related Posts Scripts and Styles End--> </head>
var relatedpoststitle="Related Posts";
<div class='post-footer-line post-footer-line-1'>
<p class='post-footer-line post-footer-line-1'>
<!-- Related Posts Code Start--> <!--Remove--><b:if cond='data:blog.pageType == "item"'> <div id='related-posts'> <b:loop values='data:post.labels' var='label'> <b:if cond='data:label.isLast != "true"'> </b:if> <b:if cond='data:blog.pageType == "item"'> <script expr:src='"/feeds/posts/default/-/" + data:label.name + "?alt=json-in-script&callback=related_results_labels&max-results=6"' type='text/javascript'/></b:if></b:loop><a href='http://www.bloggerplugins.org/2009/08/related-posts-for-blogger-widget.html'><img style="border: 0" alt="Related Posts Widget for Blogger" src="http://image.bloggerplugins.org/blogger-widgets.png" /></a> <script type='text/javascript'> var maxresults=5; removeRelatedDuplicates(); printRelatedLabels("<data:post.url/>"); </script> </div> <!--Remove--></b:if> <!-- Related Posts Code End-->
var maxresults=5;
Light Box Image Viewer For Blogger
Light Box Image Viewer For Blogger
Installation Steps
</head>
<!--Light Box Code Starts Bloggerplugins.ORG--> <style> #lightbox{ position: absolute; left: 0; width: 100%; z-index: 100; text-align: center; line-height: 0;} #lightbox img{ width: auto; height: auto;} #lightbox a img{ border: none; } #outerImageContainer{ position: relative; background-color: #fff; width: 250px; height: 250px; margin: 0 auto; } #imageContainer{ padding: 10px; } #loading{ position: absolute; top: 40%; left: 0%; height: 25%; width: 100%; text-align: center; line-height: 0; } #hoverNav{ position: absolute; top: 0; left: 0; height: 100%; width: 100%; z-index: 10; } #imageContainer>#hoverNav{ left: 0;} #hoverNav a{ outline: none;} #prevLink, #nextLink{ width: 49%; height: 100%; background-image: url(data:image/gif;base64,AAAA); /* Trick IE into showing hover */ display: block; } #prevLink { left: 0; float: left;} #nextLink { right: 0; float: right;} #prevLink:hover, #prevLink:visited:hover { background: url(http://lh5.ggpht.com/_u4gySN2ZgqE/SnWk89-4azI/AAAAAAAAAj8/hM0MqnVouCQ/prevlabel%5B3%5D.gif) left 15% no-repeat; } #nextLink:hover, #nextLink:visited:hover { background: url(http://lh6.ggpht.com/_u4gySN2ZgqE/SnWk9-mNiQI/AAAAAAAAAkA/Zg1jXV9xnQM/nextlabel%5B6%5D.gif) right 15% no-repeat; } #imageDataContainer{ font: 10px Verdana, Helvetica, sans-serif; background-color: #fff; margin: 0 auto; line-height: 1.4em; overflow: auto; width: 100% ; } #imageData{ padding:0 10px; color: #666; } #imageData #imageDetails{ width: 70%; float: left; text-align: left; } #imageData #caption{ font-weight: bold; } #imageData #numberDisplay{ display: block; clear: left; padding-bottom: 1.0em; } #imageData #bottomNavClose{ width: 66px; float: right; padding-bottom: 0.7em; outline: none;} #overlay{ position: absolute; top: 0; left: 0; z-index: 90; width: 100%; height: 500px; background-color: #000; } </style> <script src='http://ajax.googleapis.com/ajax/libs/prototype/1.7.0.0/prototype.js' type='text/javascript'/> <script src='http://ajax.googleapis.com/ajax/libs/scriptaculous/1.8.3/scriptaculous.js' type='text/javascript'/> <script src='http://blogergadgets.googlecode.com/files/lightbox.js' type='text/javascript'/> <!--Light Box Code Ends Bloggerplugins.ORG--> </head>
Adding Images for the Lightbox Viewer
